Monday, December 31, 2007

From our family to yours...


May your 2008 be filled with food, fun, friends, and family!

Happy new year!!!
Monday, December 17, 2007

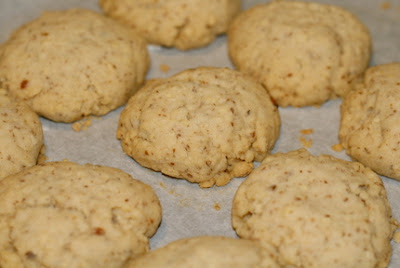
Brown Butter Almond Shortbread Cookies


I love shortbread. And I'm always on the lookout for a good shortbread recipe. I think I can stop looking now because I've found what is possibly the best one.

Browning the butter gives the cookies a nice, rich, deep flavor and adds a nutty dimension to the recipe. You can use any nut you like. The original Bon Appetit recipe called for pecans. But I had almonds on hand so that's what I used.

Brown Butter Almond Shortbread Cookies


2 sticks butter, room temperature (1 cup, divided)
2 cups all purpose flour, sifted
1/4 tsp. salt
1/2 cup sugar
1 tsp. vanilla
1 cup almonds, processed until texture is like coarse cornmeal

1. In a heavy bottomed pan, melt one stick of butter over low-medium fire and cook until amber in color. It will take about 6-8 minutes. Make sure butter doesn't burn.
2. Strain butter and cool in fridge until semi-solid.
3. Meanwhile sift flour and salt together. Set aside.
4. Cream butters and sugar until fluffy.
5. Add vanilla and nuts.
6. Add flour and mix just until incorporated.
7. Form one inch balls with your hands and place on a cookie sheet.
8. Flatten balls slightly with your palm and bake in a 300 degree oven for 40-45 minutes.
9. Cool on a wire rack.

Tomato Sauce


Marcella Hazan is considered to be a goddess of Italian cooking. Her Essentials of Classic Italian Cooking remains to be one of the ultimate Italian cooking resources today. I've borrowed the book from the library but have still yet to get my own copy. Maybe my Secret Santa will give me one this Christmas :-)

This highly unusual tomato sauce recipe is inspired by her. It might not sound like much, and I admit I was a skeptic, but the end result is rich, simple and oh so good. On spaghetti, with some freshly grated parmegiano, it truly is what Italian cooking is all about.

Tomato Sauce inspired by Marcella Hazan

1 can whole plum tomatoes (get the best ones you can buy, San Marzano preferably)
1/4 cup butter (or 1/2 stick)
1 medium onion, halved
salt to taste

1. Open can.
2. Dump everything into a heavy pot and simmer for 30-40 minutes.
3. Add salt.
4. Puree with hand blender.
5. Serve on top of your favorite pasta with freshly grated parmegiano reggiano.

Chicken with Szechuan Peppers


I'm always on the look out for new spices. So when I saw these Szechuan peppers in my regular Asian supermarket haunt, I quickly put them in my cart to use for my next cooking adventure.

Normally, when I cook, I don't measure. I open my pantry, see what I have, take it from there, and play it by ear (or by tongue, I suppose). This also means that I normally don't use measuring spoons. I often pour and sprinkle, going mostly by gut feel, and taste as I go along. But once in a while, I regret not using a measuring implement. Today was one of those days...

I snipped a corner of the Szechuan pepper bag and poured what I was planning to be about a teaspoonful of pepper. Instead, I must have put 2 tablespoons worth! I tried to get as much of it out of my already sizzling pan, but I could only do so much damage control. Luckily, the dish turned out okay. The peppers added an unintended "crunch" which I'd much rather not have with my chicken :-P

Chicken with Szechuan Peppers

400g ground chicken
1 asian eggplant, minced into 1/4 inch pieces
5-6 fresh shiitake mushrooms, minced into 1/4 inch pieces
2 tsp. minced garlic
6 slices ginger
2 stalks green onion, sliced thinly
1 tsp. szechuan peppers
2 tbsp. chinese cooking wine
1/4 cup chicken broth
2+2 tbsp. soy sauce
2 tbsp. oyster sauce
2 tbsp. hoisin sauce
1 tsp. chili garlic oil
1 tsp. sesame oil
1 tbsp. sugar
1 tbsp. rice vinegar

1. Marinate ground chicken in 2 tbsp. soy sauce and cooking wine. In a separate bowl, mix the rest of the soy sauce, oyster sauce, hoisin sauce, chili oil, sesame oil, sugar, vinegar and chicken broth. Set aside.
2. Heat oil in a wok/pan until very hot. Put szechuan peppers and saute until fragrant.
3. Add garlic, ginger and green onions.
4. Saute aromatics for a couple of minutes.
5. Add chicken, cooking until it is no longer pink.
6. Add eggplant and mushrooms, keeping the food moving in the pan. Cook until vegetables are soft.
7. Pour in sauce mixture and saute just until the chicken and veggies are coated with the sauce.

Score!

We went on a roadtrip to New York/New Jersey last week to meet up with family. It was sort of a pre-Christmas thing. We drove (with our dog!) and spent a few days with my dad catching up, shopping, and eating :-)

We went to TJ Maxx and take a look at what I snagged!


Yup, a Le Creuset 5 1/2 quart dutch oven for $99.99!!! I almost jumped when I saw it in the store. Plus the color matches my 12 inch skillet. Happy dance! :-)

P.S. The hubby got a dSLR camera as an advanced Christmas gift. I've started using it for my photos. What a difference! Another happy dance! :-)

Tuesday, November 27, 2007

Chicken Casserole ala Campbell


What can you make with chicken thighs, a can of Campbell Cream of Mushroom Soup and some imagination? You can come up with a dinner that's surpisingly very good and extremely easy to make!

Chicken Casserole ala Campbell
8 chicken thighs, trimmed of excess skin and fat
garlic seasoning (which I got from Costco...I think any steak seasoning would make a good sub)
3 shallots, sliced
1 can cream of mushroom soup
3/4 can water
1 tsp. pepper
salt to taste (if necessary)
1 tbsp. worcestershire sauce
1 tbsp. whole grain mustard

1. Sprinkle chicken generously with seasoning.
2. Over medium-high heat, heat oil in an oven-proof skillet (I used an enamelled cast-iron one).
3. Brown chicken on all sides. Set aside.
4. Saute shallots until soft.
5. Add soup, water, pepper, worcestershire sauce and mustard. Mix with a whisk until smooth.
6. Taste and adjust the seasoning at this point.
7. Place chicken in the skillet.
8. Bake in a 350 oven for 30 minutes.
9. During the last 5 minutes or so, turn on the broiler to brown and crisp up the chicken skin. Watch that it doesn't burn! (I'm notorious for this!)

I served this with smashed potatoes with the sauce as the gravy. Another "make again" dish for me.

Chili


I will not claim that this chili is authentic. There are chili fanatics out there who feel that chili should not have beans, or tomato paste, or should only used chopped and not ground beef. What I will attest to is that this chili is gooooood...at least we here in our humble home think so :-)

Chili

500 g lean ground beef
1 can red beans, rinsed and drained
1 small can tomato paste
1 cup beef broth
2 tbsp. texmex seasoning (I used clubhouse, but you could sub this with a mixture of cumin, paprika and chili powder)
1 medium onion, chopped
1 red bell pepper, seeded and chopped
1 tsp. chopped garlic
1 tsp. sugar
salt to taste (I used a full sodium beef broth so I didn't use much)
1 ancho chili in adobo sauce, sliced
2 tbsp. salsa lizano

1. Saute onion and pepper until soft.
2. Add garlic and sute a few minutes until fragrant.
3. Add beef and cook until no longer pink.
4. Add tomato paste, texmex seasoning, sugar, and ancho chili.
5. Pour in beef broth and beans.
6. Simmer for 20-30 minutes.
7. Season with lizano sauce and salt to taste.
8. Simmer 5 more minutes unti flavors come together.

I like this topped with a bit of cheese and some sour cream on the side. I also had a bag of corn chips lying around that I had bought from a latino grocery. It was a perfect supper for a cold winter night.

Sunday, November 25, 2007

Toffee bars


This has got to be the easiest toffee bar recipe ever. Prep time is maybe ten minutes max. And the results...excellent. Chewy and sticky, with just the right crunch from the nuts. Yum!

Toffee Bars
1 1/2 cups graham cracker crumbs
1/2 cup butter, melted
1 can condensed milk
1/2 cup toffee chips (I used Nestle Skor chips)
1/2 cup semi-sweet chocolate chips
1/2 cup chopped almonds (or whatever nut you like)

1. Preheat oven to 325.
2. In a bowl, mix graham cracker crumbs and butter until well blended.
3. Press firmly into a lined 9x9 pan (I used parchment to line it).
4. Bake for 10 minutes.
5. Pour condensed milk on top of crumb mixture.
6. Sprinkle toffee chips, chocolate chips and nuts evenly .
7. Press down with spatula (or the back of a large spoon) until the "solids" have "embedded" into the condensed milk.
8. Bake for 40 minutes.
9. Cool completely.
10. Put in fridge for 30 minutes, remove from pan and cut into desired slices.

Monday, November 19, 2007

Cioppino

And now back to our regular programming...

It's been so long since I had a good seafood meal. Actually, that's not entirely correct. Last week, we had dungeness crabs for dinner. One whole steamed crab for each one of us. It was heavenly!

Anyways...

I've always wanted to try making cioppino, which is an italian seafood stew made with an assortment of the freshest seafood. So off I went to Bill's Lobsters in Chinatown East and bought my ingredients. I googled cioppino recipes, found one that I could use as a launching point, and here's what I came up with.


Cioppino

3 tbsp. olive oil
1 medium onion, chopped
2 shallots, chopped
3 tsp. chopped garlic
1/2 fennel bulb, sliced thinly
1 tbsp. fish sauce
1 tbsp. salt
1/2 tsp. chili flakes
1 bay leaf
1/2 tsp. dried basil leaves
1 can whole tomatoes in juice
6 cups shrimp stock (or fish stock)
1 lb. halibut fillet, cut into cubes
1 lb. mussels, cleaned
1 lb. headless shrimp, deveined
1/2 lb. sea scallops, cut into fourths (or bay scallops would work too)
1/2 lb. squid, cleaned and cut into rings

1. In a very large pot, heat olive oil and saute onion, shallots and fennel until soft.
2. Add garlic and chili flakes and saute for a couple of minutes.
3. Add tomatoes, stock, salt and fish sauce.
4. Cover and simmer over low heat for about 30 minutes.
5. Adjust seasonings, remove bay leaf, then puree with a hand blender.
6. Add mussels and cook until they open.
7. Add the rest of the seafood and simmer gently for about 5 minutes just until everything is tender and opaque. Be careful not to overcook the seafood!
8. Serve with some crusty garlic bread.

We had this last night for dinner. It was perfect with a few glasses of Riesling. We had LOTS of leftovers so we gently reheated them tonight and it was even better! I think the stew develops its flavors over time. Very, very, very good! Definitely one to make again another night, maybe when we have guests :-)

Tuesday, October 23, 2007

The Chocolate Cake of My Childhood


Looking at my finished product, one could never tell that this baking adventure was pretty much a disaster. The batter overflowed, spilled on the oven floor, caught fire and almost tripped my fire alarm!

I started out fine. The batter tasted really good and I was in high spirits as I put the cake pan in the oven. But 15 minutes into the baking, I saw that the batter was rising higher than I expected and so I hurriedly slipped cookie sheets underneath the cake pan to catch the batter drippings. I thought I had averted the disaster but it wasn't enough. The batter dripped out of the the cookie sheets too! The batter spilled onto on the oven floor and caught fire. So I had to find a way to wipe it off. I decided to use wet paper towels and used my BBQ tongs to reach in. Of course, as soon as the paper towels touched the heating elements, they ignited and I had to run to the sink to douse them with water! So there I was, trying my best not to keep the oven door open too long so my cake could bake properly but at the same time trying to get all of the spilled batter cleaned up and prevent things from catching fire. Whew! The lengths we go to for chocolate cake, eh?

In the end, despite everything, the cake turned out fine. More than fine, actually. The edges were a tad bit over cooked but the center was chocolatey and tender. I really liked the frosting, even though I wasn't expecting much from the recipe. This recipe will see a repeat performance, but I'm going to use a bigger cake pan. And I will have a fire extinguisher nearby.


Chocolate Cake


1 1/2 cups butter, room temperature
3 cups sugar
3 eggs
3 1/4 cups cake flour
3/4 tsp. salt
3/4 cup cocoa powder (not dutch processed)
1 tbsp. baking powder
1 tbsp. baking soda
1 cup mayonnaise
1/2 cup milk
1/2 cup water
1 tbsp. white vinegar
3/4 cup boiling water

1. Cream butter and sugar until light and fluffy.
2. Add eggs one at a time until incorporated.
3. Meanwhile, in a separate bowl, sift together flour, salt, cocoa, baking powder and baking soda. In another bowl, whisk mayo, milk, water and vinegar together.
4. Add the dry ingredients alternating with wet ingredients to the butter, starting and ending with the dry. I did 3 batches of dry and 2 batches of wet.
5. Add boiling water last and mix batter until smooth.
6. Bake in a 13x9 pan (that's what the original recipe called for, but keep my (mis)adventure in mind) in a 350 oven for 50-60 minutes, or until a cake tester inserted in the middle comes out clean.
7. Cool in pan and invert onto a serving tray.
8. Frost with chocolate frosting.

Chocolate Frosting

3/4 cup sugar
1/4 cup cocoa powder
2 tbsp. cornstarch
1 cup milk
1 tbsp. butter

1. In a saucepan, whisk ingredients together until there are not lumps.
2. Heat over low-medium fire until mixture begins to thicken.
3. Remove from heat and add butter.
4. Whisk occasionally until mixture cools.

I'm going to try this next time with a caramel layer in the middle of the cake. Just like the "Cookie Monster" chocolate cake of my childhood.

Short Cut Kare-Kare


Kare-Kare is one of those uniquely Filipino dishes. A rich stew of oxtail, ground rice, ground peanuts and vegetables, eaten with shrimp paste...it doesn't sound like much, but every special occasion back home would be incomplete without this family favorite.

Normally, when this dish is made, it takes almost a whole day. The meat needs to be boiled until tender, the rice needs to be toasted then ground, the peanuts need to be ground finely into a paste, etc, etc. In this busy world, having that much time to make a single dish would truly be a luxury. Thankfully, there are ready-mix packets of sauce that one could easily tweak. With a bit of adjusting here and there, a more than adequate kare-kare is mere minutes away.

Short Cut Kare-Kare

3 lbs. oxtail, cut into 2-inch pieces
6 cups water
1 onion, quartered
2 cloves garlic, peeled
1 tbsp. salt
1 1/2 packs Mama Sita's Kare-Kare mix
2 cups long beans/sitaw, cut into 2 inch pieces
10-12 pcs. okra
3 cups bok choy
1 cup smooth/creamy peanut butter
1/4 cup sugar
fish sauce to taste

1. Boil oxtail in water with onion, garlic and salt until tender. I used a pressure cooker for 20 minutes. Set aside meat. Drain and skim fat from stock.
2. In a bowl, mix 2 cups of stock with the kare-kare mix and peanut butter. Set aside
3. In a heavy pot, simmer rest of stock and cook okra and long beans until almost tender.
4. Add the kare-kare mix/peanut butter mixture and the meat.
5. Add sugar and fish sauce to taste.
6. Put in the bok choy last.
7. Simmer for a few minutes until bok choy is done and sauce has thickened.
8. Serve with bagoong/shrimp paste.

Other veggies that normally go into kare-kare include eggplants and banana hearts. Tripe and other internal organs can be used too. But my kids just like the oxtail, so oxtail it is.

Monday, October 22, 2007

Sisig


I posted about my first sisig attempt a few months ago but I never really got to jot down the recipe. I often cook without a recipe and so it becomes a problem when I attempt to recreate something that I cooked a long time ago. Such was the case with this dish.

This is actually why I decided to start blogging anyway. I figured that I had better start writing down my "burst of inspiration" creations lest my memory starts to fail and the dishes get lost in oblivion.

So here's the recipe (or at least my approximations)...

Sisig
3 pcs. pork ears
4 cups water
1 tbsp. salt
2 bay leaves
1 tsp. whole peppercorns
2 cloves garlic, peeled
2 slices ginger
2 onions, 1/2 sliced and 1 1/2 minced
1 cup pureed beef liver (use a food processor)
1 cup crushed chicharon
1 thai bird chili, sliced into thin pieces
1 cup beef or chicken broth
1/4 cup lemon juice
2 tbsp. knorr or maggi seasoning
1 tsp. ground black pepper

1. Boil pork ears in water, salt, bay leaves, peppercorns, garlic, ginger and sliced onion. Boil until tender. Or you could use a pressure cooker x 15 minutes.
2. Drain pork ears well and mince into 1/4 inch pieces. Set aside.
3. In a non-stick pan, saute 1 minced onion and add pureed liver.
4. Once liver is no longer pink, add pork ears, 3/4 of the chicharon, pepper and the chili.
5. Add 1/2 of broth and season with 1 tbsp. maggi/knorr and half of the lemon juice.
6. Cook until liquid is almost gone then repeat step #5.
7. Cook until some bits have become crisp and you get good caramelization.
8. Add the rest of the onion and chicharon just before serving.
9. Squeeze additional lemon juice and seasoning (plus hot sauce as desired) on top.
10. Eat with lots of garlic rice.

I also made garlic kangkong on the side. It felt like we were back home eating in Gerry's :-)

Bang-Bang Beef Curry

I got the "bang-bang" idea from someone who makes her roast chicken with whatever sauces and condiments she has in her fridge. Bang-bang refers to the banging on the bottom of the bottle to get every bit of sauce out. Great way to use up those bottles, eh?

Anyway, I had some beef shank, half a cup of left-over coconut milk, a cup of left-over canned whole tomatoes and half a bottle of Indian curry paste. With a bit of tweaking here and there plus some hot mango chutney on top, it was another successful dinner :-)


Bang-Bang Beef Curry

1 kilo beef shank, cut into cubes (any stew cut will do)
6 cups water
1 onion, sliced
10 slices ginger
2 cloves garlic, peeled
1 tbsp. salt
4 tbsp. curry paste (I used Patak's mild curry paste)
4 tbsp. tamarind sauce (I had the Maggi brand)
1 tbsp. turmeric
1 tbsp. cumin
1 cup canned whole tomatoes (about 4 tomatoes plus juice)
1/2 to 1 cup coconut milk

1. Simmer beef, water, 1/2 of the onion, garlic, 5 slices of ginger and salt until beef is tender. I used a pressure cooker for 20 minutes. Reserve broth and set beef aside.
2. In a heavy pot, saute rest of onion and ginger.
3. Add curry paste, beef, tomatoes, tamarind sauce, turmeric, cumin and coconut milk.
4. Add about a cup of the broth.
5. Simmer for another 20 minutes, adding broth as needed to keep the dish "saucy."
6. Skim off fat as the dish is simmering. Adjust salt to taste. I didn't need to add any more since the broth already had salt and the curry paste was adequately flavored as well.
7. Serve with rice (or naan) and mango chutney.

The boys really liked it! The level of heat was perfect and the sweetness of the chutney went with the curry flavors very well.

This is why I love cooking...a few left over ingredients, a hint of creativity, a sense of adventure and voila...instant gratification on a plate :-)

Monday, October 15, 2007

Definitely not about food...

I haven't posted in a week. One whole week. I think that's the longest period of time I've gone without putting up something, anything on this blog. Why have I not been posting, you ask?

Exam coming up. Check.
Dental issues. Check.
Work til 6pm on some nights. Check.
Hubby enjoying his new cooking skills. Check.
And lastly...

New dog. Check.


Oh, I did make Ina Garten's lemon cake using key limes. It was "amazing" according to one of my colleagues. Definitely worth a repeat performance.

See. I said this post was not about food. But it always comes back to food. In the end, it's always about the food :-)

Monday, October 8, 2007

Pickled Peewee Eggs

I was browsing the aisles of my favorite Asian grocery when I saw a box of peewee eggs. Now, normally eggs come in small, medium, large and extra large. But they had extra small ones, and even tinier, these peewee eggs (shown beside a normal large egg). So cute!


At a dollar a dozen, I couldn't resist. So I bought some and pickled them :-)

Pickled Peewee Eggs


2 cups white vinegar
1 cup sugar
1 tsp. salt
1 dozen peewee eggs (or you could use 2-3 dozen quail eggs), hard-boiled and peeled

1. Simmer vinegar, sugar and salt for 5 minutes.
2. Place eggs in a sterilized wide mouth jar.
3. Pour pickling solution over eggs.
4. Keep in fridge for at least 3 days before eating (I can't wait!!!)

Toasted Coconut Cupcakes


I used to not like coconut in my baked goods. But ever since I left the Philippines, I've been craving all things coconut...coconut scented soaps (like the one by my kitchen sink), coconut flavored ice cream (Ben and Jerry's is THE BEST!), and now coconut baked goods. I saw Anna Olson's show which showcased this recipe and I just had to try it.

Toasted Coconut Cupcakes

2 cups unsweetened coconut flakes
1/3 cup vegetable oil
1 + 1/4 cup coconut milk
2 eggs, separated
2 1/4 cups pastry flour
1 + 1/2 cup sugar
1 tbsp. baking powder
1 tsp. salt

1. Toast coconut flakes in a 350 oven for 3-4 minutes, just until the edges turn light brown. Set aside and increase oven temp to 375.
2. Mix egg yolks, oil and 1 cup of the coconut milk. Set aside.
3. Sift together flour, baking powder, salt and 1 cup of the sugar.
4. Mix dry ingredients into the wet and stir in 1 1/3 cups of the toasted coconut.
5. In a separate bowl, beat egg whites and 1/2 cup sugar until soft peaks form.
6. Fold the egg whites into the batter.
7. Pour batter into 16 muffin cups (or 1 8x8 pan).
8. Bake for 20-22 minutes (or 25-30 minutes for square cake).
9. Cool cupcakes.
10. Brush tops with remaining coconut milk and dip into the coconut flakes.

The cupcakes were very good! Light and coconutty. I think next time I'm going to try filling them with pineapple curd, maybe with a hint of rum. Kind of like a pinacolada cupcake :-)

Friday, October 5, 2007

Moroccan Beef Stew


This was a big hit tonight! It was so good that I've decided that the next time I have guests over, this is what I'm going to serve. With couscous, a green salad and maybe some pita, I think it would make a perfect fall meal.

Moroccan Beef Stew


4 pieces beef shank or 2 lbs. stewing beef
salt and pepper
1 onion, sliced
3 cloves garlic, minced
1 red pepper, cubed
2 cinnamon sticks
3/4 tsp. cumin
1/2 tsp. turmeric
1/2 tsp. fennel seeds
2 cups tomatoes (I used canned whole tomatoes with the juice)
1/4 cup soy sauce (I know this isn't Moroccan but it adds so much flavor)
1 cup raisins
1 cup green olives

1. Season beef with salt and pepper.
2. In a heavy pot (I used an enameled cast iron one), brown the beef well. Set aside.
3. In the same pot, saute onion, garlic and red pepper until soft.
4. Add the tomatoes, cinnamon, cumin, turmeric, fennel and soy sauce.
5. Put beef back into pot and lower heat to a slow simmer.
6. Cover pot and simmer for 45 minutes.
7. Add raisins and olives. Cover and simmer for another hour until beef is tender.

Wednesday, October 3, 2007

A whole lot of chicken


Last week...

Son #1: Oh, BTW mom, I volunteered to bring chicken for our thanksgiving lunch next Thursday.
Me: Oh really? How many people will be going?
Son #2: Well, there are 22 in my class plus our teachers and the parent volunteers.
Me (trying hard to be calm): Ok then. Chicken it is.

Today:

Me: Holy cr@p! The thanksgiving lunch is tomorrow!

So what do you do when you need to make chicken for 22 kids and their teachers?

1. Run to the grocery and buy 36 chicken drumsticks.
2. Season chicken with salt, pepper, paprika and garlic powder.
3. Add a cup of oil and toss chicken around until pieces are uniformly covered with seasoning.
4. Marinate for an hour.
5. Preheat oven to 400. Bake chicken for 20 minutes. Flip and bake 15 minutes more.
6. Meanwhile, mix together 2 cups of bottled bbq sauce, 1/4 cup soy sauce and 1/4 cup hoisin sauce.
7. Once chicken is cooked, toss in sauce.
8. Bake 5 minutes per side.
9. Done.

Whew, that wasn't so bad. I even had time to wrap some foil around the drumsticks. I'm sure the teachers wouldn't appreciate 22 pairs of sticky hands.

Sunday, September 30, 2007

Mango Torte


No matter what anyone says, I think the Philippines has THE BEST mangoes in the world. Nope. Save your breath. No one can convince me otherwise.

This recipe combines two of my favorite things: mangoes and dacquoise. Dacquoise is basically a nut-meringue which is used as a base for cakes and other desserts. Its chewy-crunchy texture is a perfect foil to creamy frostings and fillings, like buttercream. Back home, one of the most popular desserts, sans rival, is basically cashew dacquoise layered with decadent buttercream.

I had never attempted to make a dacquoise before, although I've tried my hand at pavlova a few times. Since we were going to Tita M and Tito O's for dinner, I figured that this was a perfect time to be brave and wander into the world of dacquoise making.

Dacquoise (based on The Joy of Cooking)
3/4 cup almonds
1 tbsp. cornstarch
1/2 cup sugar
4 egg whites
1/2 tsp. white vinegar (the recipe called for cream of tartar but I didn't have any)

Prep: Preheat oven to 200. Draw two 8-inch circles on parchment then cut about an inch outside circles and place on cookie sheet. I used 2 cookie sheets since I had medium sized ones.

1. In a food processor, pulse nuts, cornstarch and sugar until mixure looks like breadcrumbs.
2. Set aside.
3. Beat eggwhites and vinegar on medium speed until soft peaks form.
4. Gradually add sugar while beating on high speed until stiff peaks form.
5. Gently and gradually fold in nut mixture, taking care not to deflate the meringue too much.
6. With a spatula, form the dacquoise into circles on the parchment using the drawn guides.
7. Bake at 200 for 2 hours.

Mango buttercream
1 cup pureed mango
1 cup butter, room temperature
3/4 cup sugar
1 1/2 cups whipping cream

1. Using the whisk attachment of the mixer, cream butter and sugar until light and fluffy.
2. Add mango puree and mix well.
3. Add cream and whisk over medium high heat until stiff and frosting holds its shape.

To assemble, place one dacquoise on a serving platter. Frost with 1/3 of the mango buttercream. Put second dacquoise and frost with second 1/3 of buttercream. Use last 1/3 to frost sides.

You could probably decorate this torte with mango balls on top, but I didn't have any.

Verdict: It was ok. Hubby didn't like it too much but Tita M said it was very good. I don't know. I couldn't decide. I think there was too much buttercream between the layers. This recipe defnitely needs to be tweaked a bit. I think thinner dacquoise layers would work better. So next time, I'm going to try dividing the dacquiose into 3 and putting less buttercream between layers.

Friday, September 28, 2007

Caldereta


This dish is proof of the immense influence the Spanish had on Filipino cooking. It's difficult not to imbibe so much of a culture that was around for more than 300 years, pretty much permeating everything from our religion, to our names, our language, and our food. I think this is what makes Filipino food so different from those of our Southeast Asian neighbors. Because the Philippines was under Spanish rule for so long, add to that the omnipresence of the Chinese, Filipino food, as a final product, is truly an amalgamation of Malay, Hispanic and Chinese cuisines.

Caldereta is essentially a beef stew, along the lines of osso buco and other occidental stews, but the use of coconut milk makes it decidedly Filipino. This dish is considered "celebration food," served during birthdays, fiestas and other gatherings. It's a Friday. In my book, that is always cause for celebration.

Caldereta


2 lbs. beef, cubed
1 medium onion, sliced
3 cloves garlic, minced
2 bay leaves
1/2 can whole tomatoes (about 4-5 pieces and half the juice)
salt
pepper
1/2 cup beef broth
2 tbsp. soy sauce
2 cups coconut milk
3 potatoes, peeled and cubed
1 red pepper, cut into strips
1 cup drained whole olives

1. Season beef with salt and pepper.
2. In a heavy pot, like a dutch oven, brown beef on all sides.
3. Add onion and garlic.
4. Add tomatoes, crushing them as you add them.
5. Add soy sauce, bay leaves and beef broth.
6. Cover pot and simmer over low heat until beef is tender, about 2 hours.
7. Add potatoes, red peppers, olives and coconut milk. Adjust seasoning with salt as needed.
8. Simmer uncovered for 15-20 more minutes until potatoes are done and sauce has thickened.

Thursday, September 27, 2007

Tonkatsu


Breaded fried meat. Every culture has its version. The Italians have parmigiana. The Viennese and Germans have schnitzel. The Polish have kotletschabowy. And the Japanese have tonkatsu, which is my favorite. Somehow panko stays crisper than traditional breadcrumbs and cooks more evenly, giving you that golden brown, crunchy coating that makes breaded cutlets so good!

The key to frying up these babies is to keep the oil at a constant temperature, which means not overcrowding the pan. Fresh oil with a high smoke point is crucial too. When you bread the meat, you want the first layer of flour to be as thin as possible, just enough so that the egg has something to adhere to. After dipping the meat in the panko, let it rest for 5-10 minutes, so that the panko stays on.

Alton Brown says that you should keep one hand "wet" and one hand "dry" to prevent what he calls "club fingers." That piece of advice is good in theory, and it does minimize "clubbing" (and I mean this in a very non-medical way), but I find that clubbing is inevitable. You just need to keep a dish towel or some paper towels nearby.

Anyways, here's my version of tonkatsu.


Tonkatsu

6 pork cutlets (I use center cut quick-fry porkchops which I pound until they're about 1/4 inch thick)
1 cup flour
2 eggs, beaten
2 cups panko breadcrumbs
2 tsp. salt.
1 tsp. pepper

1. Put flour, egg and panko in three separate wide dishes.
2. Add 1 tsp. of salt and 1/2 tsp. pepper each to the egg and the flour. Mix well.
3. Make sure pork cutlets are dry. Dip cutlets in flour, making sure to shake off excess.
4. Dip in the egg, then into the panko. Press the panko onto the meat, making sure that the meat is well coated.
5. Set aside meat while you heat up your pan.
6. Fry over medium-high heat until golden on both side.
7. Slice into 3/4 inch strips and serve with tonkatsu sauce*.


*There's a brand of tonkatsu sauce that I really like, but you could substitute this home-made version in a pinch. I didn't have tonkatsu sauce tonight, so I made this. The kids couldn't even tell the difference.

For the tonkatsu sauce, mix together:

4 tbsp. tomato ketchup
2 tbsp. worcestershire sauce
1 tbsp. kecap manis (or 1 tbsp. soy sauce with 1 tsp. sugar)

In the picture above, you can see garlic kuchay, which we also had, beside the tonkatsu. Always good to have some veggies to lessen the guilt of eating something fried :-)


Wednesday, September 26, 2007

Pork and Long Beans in Coconut Milk


I mentioned before that I come from a region in the Philippines which is known for cooking everything with coconut milk. I've successfully passed on my love for coconut milk to the hubby and the boys, hence the ubiquity of coconut milk-based dishes in this blog :-)


Pork and Long Beans in Coconut Milk

1 lb. lean pork, cut into strips
1 can coconut milk (about 2 cups)
1 medium onion, quartered
2 cloves garlic, minced
3 slices ginger
2 thai chilis, chopped (optional but highly recommended)
3 tbsp. shrimp paste (Barrio Fiesta brand)
salt to taste
1 bunch long beans, cut into 2-inch pieces

1. Simmer coconut milk, pork, ginger, garlic, onions, shrimp paste and pepper until pork is tender and coconut milk has rendered some oil (about 20 minutes).
2. Season with salt to taste.
3. Add long beans.
4. Simmer for 5 minutes more until long beans are cooked but still has some crunch.

Baked Mussels with Butter, Cheese and Garlic


This is the simplest version of Baked Mussels there is.

Son #2 loves it and could probably eat a couple of dozens if I let him!

This dish is exquisite with freshly steamed mussels, but you could definitely use pre-cooked frozen mussels in a pinch (which is what I did today).


BAKED MUSSELS WITH BUTTER, CHEESE AND GARLIC

36 cooked mussels on the half-shell
3 cloves of garlic
2 tbsp. butter
2x2x2 inch cube of sharp cheese
2 tbsp. olive oil

1. Put all ingredients except mussels in a food processor and pulse until you make a paste.
2. Put about 1/2 tsp. of the paste on each mussel.
3. Bake in a 400 oven for 15 minutes until the topping is sightly brown.

Friday, September 21, 2007

Adobo sa Gata (Adobo in Coconut Milk)


Adobo is probably the quintessential Filipino dish. This dish, which is a stew of a protein in vinegar, garlic, black pepper, and soy sauce, can be found in practically every Filipino household. There are endless variations...more soy sauce, no soy sauce, dry, saucy, twice fried, chicken, pork, chicken and pork, etc., etc.


I posted a favorite recipe a few weeks back, but today I decided to try something new. Adobo sa gata is a dish popular in Marinduque, an island province in the Philippines. I based my recipe on the one in "The Best of Food Magazine Cookbook" and I just tweaked it a little bit.


12 chicken pieces (I used legs)
2 tbsp. cooking oil
4 tbsp. vinegar
2 1/2 tsp. salt (to taste)
1 tsp. ground black pepper
3 thai chilis
4 cloves garlic, minced
3 slices ginger
2 bay leaves
1 medium onion, sliced
2 tsp. turmeric powder
2 cups coconut milk

1. In a pan, heat oil and brown chicken pieces well.
2. Lower heat and add salt, pepper, onion, garlic, ginger, turmeric, bay leaves and vinegar.
3. Simmer uncovered for 15 minutes until almost all of vinegar has evaporated, flipping chicken pieces once.
4. Add coconut milk and simmer for about 20 minutes.
5. Best served with white rice (like many other things).

This recipe was a hit with the boys! Definitely a "make again" dish!

Tuesday, September 18, 2007

Baked Oatmeal v. 1

This method of preparing oatmeal transforms this plain jane grain into a wonderful breakfast treat. This version is soft and resembles some sort of pudding, with oats instead of bread. My second version, which I will post sometime time in the future, is more granola like. I like both, so it really all depends what I'm in the mood for :-)

Baked Oatmeal

3 eggs
1/2 cup oil
1/2 cup white sugar
1/2 cup dark brown sugar
3 1/2 cups oats
2 tsp. baking powder
1 tsp. salt
1 cup milk
1 tsp. vanilla

1. In a large bowl, beat eggs.
2. Add oil and sugar and mix well.
3. Stir in oats, baking powder, salt, milk and vanilla
4. Pour into a 9x13 pan and bake for 40-45 minutes in a 325 oven.
5. Cut into 8 squares. Serve with milk.

Friday, September 14, 2007

Me and http://


Thanks to this blogger for the cartoon :-)

Thursday, September 13, 2007

Banana Bread Beauties


Whenever we buy a bunch of bananas, we always end up with one or two overripe ones. I guess the boys get tired of them after a while and they sit there, languishing in our fruit basket, attracting fruit flies (which I absolutely abhor). So I throw the overripe ones in the freezer until I have enough to make banana bread, most recipes of which call for at least 4 bananas. Just thaw the frozen bananas and they're ready to use.

Tonight, I reached my 4-banana minimum, so I decided to experiment and make different flavors of banana cupcakes, which is actually just banana bread baked in cupcake holders and baked for roughly half the time. So practically any cake recipe can be made into cupcakes. Just watch your oven closely so you don't overbake them

Anyways...


I made 4 kinds: butterscotch, chocolate chip, peanut butter and sugared. I haven't tried them all so the verdict is still pending as to which one is the best. But they all look so good, don't you think?

Banana Bread (inspired by Elise)

4 bananas, smashed (my preference is to use 3 super overripe ones and 1 just on the brink)
1/2 cup white sugar
1/4 cup firmly packed brown sugar
1/4 cup melted butter
1 egg, beaten
1 tsp. vanilla
1 tsp. baking soda
pinch of salt
1 1/2 cup flour

1. Mix bananas, butter, sugar, egg and vanilla. Make sure everything is room temp or else the butter will solidify.
2. Sift in salt and baking soda. Mix well
3. Add flour and fold into wet mixture. Do not overmix so as not to develop the gluten.
4. Scoop into 12 cupcake container or a loaf pan.
5. Bake at 350 for 3o minutes (cupcakes) or 50 minutes (loaf).

You can add the "flavors" once you've mixed the batter. I like to add them after I've put the batter into the cupcake holders so that I can make different flavors in one batch. Gently mix in whatever your adding and sprinkle some on top. For the peanut butter, just swirl in a teaspoon or so.


Addendum:
Ok, I've tried them all (took a small piece from each, didn't eat 4 cupcakes in one sitting). The peanut butter is my favorite. The saltiness of the peanut butter balances the sweetness of the bread. I'm not surpised actually, since I routinely eat bananas with peanut butter anyway. Next flavor to try: Nutella!

Ginisang Munggo (Sauteed Mung Bean Stew)


This is another one of those comfort foods that bring back fond memories of my childhood. I don't even use a recipe for this because I've been cooking this dish for as long as I can remember. It's only been recently though that I've discovered that a tablespoon or so of shrimp paste elevates this dish to whole new level. The shrimp paste adds so much umami, which I think translates best to the Filipino word malinamnam.

Ingredients:
*Remember, these are approximations...
6 cups boiled mung beans
1 tbsp. oil
1 tsp. minced garlic
1 medium onion, slices
2 tomatoes, cubed
1/2 lb shrimps, peeled
1 tbsp. shrimp paste (bagoong)
salt (or fish sauce) and pepper to taste
2-3 cups green leafy vegetable, such as spinach or water cress

1. Boil the mung beans in lots of water until soft, about 30-45 minutes. Watch that the beans don't dry up. Add water as needed during the boiling process. Once done, set aside.
2. In a large pot, heat oil and saute garlic, onions and tomatoes, waiting until the garlic and onion are slightly brown before adding the tomatoes. Saute until tomatoes are very soft.
3. Add mung beans and cooking liquid. Season to taste. This is the time to add the shrimp paste, salt or fish sauce, and pepper.
4. Add shrimp. Simmer until shrimp turns opaque.
5. Add greens. Traditionally, bittermelon leaves are used, but I've used spinach and watercress with much success.
Some people will saute some pork with the garlic, onions and tomatoes. But this meat-free version is more healthful and tastes just as good :-)

Sunday, September 9, 2007

Baked Chorizo and Eggs


After a two-week trip back home, our friends S&A came over for breakfast today to catch up and bring pasalubong. We listened to their adventures over coffee, Montreal bagels, cream cheese, smoked salmon, baked oatmeal, fruits and baked chorizo and eggs.


Baked Chorizo and Eggs

4 spanish chorizos, sliced diagonally into 1/4 inch pieces
1 medium onion, cut into wedges
1/2 red bell pepper, sliced into strips
1 tsp. minced garlic
1 tbsp. olive oil
6 eggs
3 tbsp. grated sharp cheese (I used parmegiano since that's what I had, but I think Manchego would work better)
freshly ground black pepper


1. In a skillet, heat olive oil and saute chorizo until it renders some fat.
2. Add garlic and onions and saute for a few minutes.
3. Add bell peppers and cook for a minute more.
4. Divide mixture and place in oven-proof dishes.
5. Crack an egg into each container and top with cheese and a sprinkling of freshly ground black pepper.
6. Bake in a 4o0 oven for 10 minutes.


Watch the eggs as you're baking them because they can become overdone quite quickly (mine were a bit too done, oops!). Take the dishes out of the oven as soon as the eggs begin to set because the residual heat will cook them through.

I'm thinking this dish would be so much prettier if I used the traditional Spanish cazuelas. But since I didn't have any on hand, I used glass ramekins instead.

I quite liked this dish! As I was telling S&A, anything with chorizo (or bacon for that matter) is bound to be good. Hehe! Thanks for the stuff, S&A!

Saturday, September 8, 2007

Cheesecake with Balsamic Strawberries


I baked three cheesecakes a few days ago, 2 to bring to work as a good-bye treat for my wonderful co-workers, and 1 I kept at home for the boys. One of my co-workers has gluten sensitivity and so for her, I made one of cheesecakes with a walnut crust. The walnut crust was surprisingly good. I was a bit worried that it would crumble when I sliced the cheesecake, but it held up very well. I just tossed 2 cups of walnuts in a food processor and mixed it with 1/4 cup of dark brown sugar. I baked it like a graham cracker crust, 10 minutes at 300.

For the 2 cheesecakes I brought to work, I made a blueberry-lemon-sage topping and a dulce de leche topping. To make the dulce de leche, I pressure cooked a can of condensed milk for 15 minutes. Make sure the can is fully submerged when you do this. And do not, I repeat, DO NOT open the can until it is completely, and again I repeat, COMPLETELY cool.

The last cheesecake, I served to my boys with a balsamic strawberry topping. Hull and slice a container of strawberries, place in a pot with 2 tbsp. sugar and 1 tbsp. balsamic vinegar. Heat through and add a slurry of 1 tsp. cornstarch in 1 tbsp. water. Simmer until it has thickened a bit.

The strawberry topping and dulce de leche were good, but I must say that the blueberry topping is still my favorite. :-)

Cheesecake recipe here...

Shrimp with Special Sauce


This simple recipe is always a hit with the boys. The sweet-salty sauce coating the shrimp requires one to eat with the hands. Using forks and knives (or spoons) is simply an injustice. There is requisite slurping and licking as one tries to get every bit of garlicky goodness before peeling the shrimp. One then breaks of the head, and savors the shrimp fat within. Each segment of the shell is then peeled away to reveal the tender sweetness. The peeled shrimp is then used to scoop up more sauce, placed on a mound of steaming white rice, and popped into the mouth whole. Yum!


Shrimp with Special Sauce

1 kilo shrimp (I usually cut off the long antennae and the tip of the sharp barb on the head)
3 tbsp. minced garlic
2 tbsp. butter
1 tbsp. cooking oil
1/2 cup oyster sauce (Lee Kum Kee is my preferred brand)
1/2 tsp. sugar
2 tbsp. water

1. In a pan, melt butter and oil and saute garlic until light brown.
2. Add in the shrimp, oyster sauce, sugar and water.
3. Stir-fry for a few minutes, just until shrimp turns pink.
4. Serve with lots of rice.

Friday, September 7, 2007

Food and Wine Tasting


A good friend came to visit from Calgary and right after we picked him up from the airport, we headed straight to Ontario's top tourist destination...Niagara Falls. Big mistake. It was the Labor Day holiday, a long weekend on both sides of the border, so Niagara Falls was PACKED! Agoraphobia, here we come! But we had trekked all the way, so we decided to grin and bear the maddening crowd. We even rode the Maid of the Mist (first time for us!) and the kids had a blast getting soaked.

My favorite part of the trip was a visit to Niagara-on-the-Lake. We wanted to visit more wineries but the traffic was so bad that we only had time to do one. We decided to do the Art of Food and Wine at Peller Estates. This particular tasting combined different wines with different foods to demonstrate how food and wine can clash or complement. For this tasting, we were given a sauvignon blanc, an unfiltered merlot, and a vidal ice wine. And for our food, we had a cucumber mint soup, smoked beef ribs on rice with artichoke hearts, and for dessert, an oatmeal cake with brown sugar cream cheese frosting. You can see from the picture that the servings were pretty tiny. But for $12, you can't really expect much bigger morsels, I suppose.

The sauv blanc was crisp and light and it really enhanced the grassy notes of the soup. The freshness of the cucumber came through even after we had sipped the wine. Excellent pairing. Of course, our host asked us to try the soup with the merlot. Bleh. The merlot was definitely too strong for the soup.

Next up was the meat and merlot pairing. The merlot we were given was very rich and full-bodied. Lots of tannins and very robust. This was definitely not a sipping wine. In fact, I didn't quite like it when we first took our sips. Our host asked us to try it first with the soup. Not good. But when we had it with the smoked beef, the proteins in the meat broke down some of the tannins and smoothed out the wine a great deal. Gone was the mouth-puckering bite and the background flavor of fruit, mostly berries, began to come through. Amazing what the right food will do to a sip of wine and vise-versa.

For dessert, we had an ice wine, which is Ontario's biggest wine product. The grapes for ice wine are harvested in the dead of winter, when the freezing temperature concentrates the sugar in the fruit. The resulting wine is very sweet, almost syrupy. And the first time you try it, it's actually quite a shock to the palate. Our host, though, put it quite nicely. She says that a sip of ice wine at the end of a meal is like the clash of a cymbal in a symphony. Done with restraint, it gives that necessary oomph, that point of emphasis, that fleeting high. But repeated cymbal clashes deafen the ears like a whole glass of ice wine overwhelms the taste buds.

All in all, it was a lovely experience. I'd do it again in a heartbeat. Just not on Labor Day weekend.

Spaghetti alla Carbonara with Sea Scallops


What do you do when you have a pound of excellent bacon and a wedge of parmegiano reggiano? Make carbonara, of course! The name of this simple but delicious pasta dish comes from the Italian word carbone, which means coal. Pretty ironic since the pasta is white, no? But many believe that the origin of the name comes from the fact that this pasta was a staple meal of coalminers because it could be made with very few ingredients, all of which kept well without refrigeration: pasta, eggs, hard cheese, and dried meat.

I used the recipe from Mark Bittman's How to Cook Everything and just fiddled around as I went along. Sea scallops were on sale, so why not make a good thing even better?


Spaghetti alla Carbonara with Sea Scallops

1 pound spaghetti (I used spaghettini)
1/2 pound bacon, sliced into 1 inch pieces
2 eggs
1 cup grated parmegiano
freshly ground black pepper
seared sea scallops*
1. In a skillet, cook bacon until crisp. Drain most of the fast, leaving about 2 tbsp. in the pan. (In an ideal world where calories wouldn't matter, I'd use all the drippings. But, oh well.)
2. In a separate bowl, mix eggs and cheese together.
3. Cook pasta according to package directions.
4. Add pasta to egg and cheese mixture. Add bacon and season generously with pepper. Mix well.
5. Top with sea scallops and a sprinkling of sea salt.
*For the sea scallops, melt butter in a small skillet. Pat scallops dry and season with salt and pepper. Sear scallops until caramelized, about a minute per side.

Saturday, September 1, 2007

Chicken Wings


1/4 cup butter
3 tbsp. tomato ketchup
2 tbsp. bbq sauce
2 tbsp. soy sauce
2 tbsp. sweet chili sauce
2 tsp. sriracha hot sauce (add less or more depending on how hot you want your wings)
1 tsp. worcestershire
salt to taste (amount really depends on whether you're using salted or unsalted butter)


1. Mix everything together in a saucepan over low flame until the butter emulsifies into the rest of the ingredients.

2. In large container with a lid, put cooked wings and pour sauce on top.

3. Shake, shake, shake until all the wings are coated with the sauce.

4. Serve with blue cheese dressing* and celery sticks.

*Mash blue cheese into sour cream. Add a splash of worcestershire.


Traditionally, this recipe calls for deep fried wings but I actually cook my wings in the oven. No fuss, no muss. Plus I can do LOTS of wings without having to slave over a splattering pot of hot oil. For instance, today, I made about 50 wings, which fit nicely in my oven all in one go.

Place wing pieces in a single layer on a cookie sheet lined with parchment (to prevent sticking). Bake in a 450 oven for 15-20 minutes. Flip chicken pieces over and bake 15-20 minutes more until nice and golden brown.

Oven-grilled Pork Ribs


I don't understand how some people can eat ribs with a fork and knife. For me, the entire point of eating ribs is so you can use your fingers, get down and dirty, and bite juicy, saucy chunks of meat off the bone. Maybe that's why I'd rather eat ribs at home than in a restaurant. At home, no one will stare if at the end of the meal, I'm wearing sauce on my face like some sort of war paint. And I can lick the sauce off my fingers and make smacking sounds to my heart's content :-)

My favorite way to make ribs at home is in the oven. I don't have the space for those huge grills that will allow me to cook ribs over indirect heat and smoke them with wood chips so I can't really say if that cooking method will give me superior results. But the oven gives me consistent heat and thus produces a tender and juicy product every time.

The key to falling-off-the-bone ribs is to use low heat. This principle holds true whether you use the oven or the grill. Some people like to boil their ribs to tenderize them. I used to do this a long time ago, but I've found that a lot of the flavor was lost during the boiling process. A low, slow stint in the oven breaks down all that connective tissue between the bones and makes the ribs succulently soft but not mushy.

Anyways, enough of the chatter. On to the recipe...

1. Rub the ribs (I used 2 whole racks) with a good steak seasoning or sprinkle with the rub ingredients below.

Rub:
salt
pepper
garlic powder
paprika

2. Wrap ribs in foil, place on a tray and cook in a 300 degree oven for 2 to 2 1/2 hours.
3. Take ribs from oven and pour off the fat that is rendered. Increase oven temp to 450.
4. Glaze both sides of the ribs.

Glaze:
1/2 cup brown sugar
1/2 cup tomato ketchup
1/2 cup soy sauce
1 tsp. minced garlic
1 tsp. sriracha hot sauce (optional)
1 tsp. smoked paprika
2 tbsp. hoisin sauce
2 tbsp. apricot jam
2 tbsp. balsamic vinegar
2 tbsp. worcestershire sauce
*Simmer everything in a saucepan for about 5 minutes.

5. Return ribs to oven, unwrapped, top side down. Cook for 8-10 minutes.
6. Flip ribs over and glaze the top a second time. Return to oven for another 8-10 minutes or until the sugar from the glaze has caramelized and you get a few dark areas.
7. Let ribs rest for about 10 minutes before serving.

Wednesday, August 29, 2007

Asian Brined Chicken

It's been a crazy week. Son #1 needed surgery and the past few days felt like I was on an emotional roller coaster. Fortunately, everything went well and he's home now, recuperating.

I've missed my kitchen, I've missed cooking, and I've missed blogging. And after preparing tonight's dinner, laying out the table, saying grace and eating together, I feel some semblance of normalcy already.

I brined this chicken last night and the 24-hour soak really worked wonders. The chicken was very juicy and amazingly flavorful. Even the breast meat, which can sometimes taste bland, was excellent. Of course having each bite with a bit of crisp skin helped.

Asian Brined Chicken

1 3-4 lb. chicken
4 cups water
1/2 cup oyster sauce
1/2 cup dark soy sauce
1 tbsp. sriracha hot sauce (optional)
2 tbsp. grated ginger
1 tbsp. minced garlic
3 stalks lemongrass, chopped into 1 inch pieces
3 kaffir lime leaves
1/4 cup chinese rice wine
2 tbsp. rice vinegar
2 tbsp. sugar
2 tbsp. five spice powder

1. Mix all the ingredients except the chicken until well blended.
2. Soak chicken in brining liquid for 12-24 hours. Keep chicken in fridge.
3. Butterly chicken (or not, if you so prefer) and roast at 325 for 45-50 minutes.
4. Raise oven temperature to 400 and roast chicken for 15 minutes more.
5. Alternatively, you could use a turbo broiler and roast chicken at 175, skin side down for 30 minutes. Flip chicken over and roast another 30 minutes.
6. Allow chicken to rest for about 5-10 minutes before serving.

The low roasting temperature for this dish allows the chicken to cook without overbrowning. The soy sauce, oyster sauce and sugar will burn if you roast the chicken at a high temperature. So start low and then increase the temperature toward the end of cooking to brown and crisp the skin.

Son #2 had his chicken with hoisin sauce, but I enjoyed mine with a sprinkling of Eurasian Black Sea Salt, which has an "eggy" flavor due to its higher sulfur content. It was a very nice "welcome back home" meal indeed.

Thursday, August 23, 2007

Apple-Onion Pork Chops with Smashed Garlic Potatoes

It's only been 3 days, yet I feel like I haven't posted since forever! Well, for Tuesday night, we had M over and it was pasta for dinner, but I used bacon instead of chorizo. Then Wednesday night was left-overs for the boys since I had a work thing. So to make up for left-over night, for dinner we had this...
Apple-Onion Pork Chops

6 pork chops, boneless, each about 3/4 inch thick
kosher salt
pepper
2 fuji apples, peeled and diced
1 sweet onion, sliced
1 heaping tsp. whole grain mustard
4 sage leaves
1/2 cup white wine
1 cup chicken broth

1. Season chops generously with salt and pepper.
2. In a heavy skillet, sear meat until both sides are well browned.
3. Remove meat from skillet, lower heat to medium and add onions and apples.
4. Saute until onions are partly softened, about 5-7 minutes.
5. Deglaze pan with white wine and add mustard and sage.
6. Reduce until almost all of wine has evaporated.
7. Add chicken broth.
8. Return chops into skillet along with juices.
9. Finish in a 375 oven for 15 minutes.

I served this dish with smashed garlic potatoes, which is one of my favorite ways of preparing potatoes. The skin provides a wonderful contrast to the rustic creaminess of the potato chunks.

Smashed Garlic Potatoes

6 Yukon gold potatoes, washed well
1 tbsp. minced garlic
2 tbsp. butter
1/2 cup cream or milk
salt and pepper

1. Boil potatoes with their skins on until tender.
2. Drain. In a large bowl, use a potato masher or a large sturdy fork to smash potatoes. Smash the skins as well. You want small and large chunks, not a homogenous, mushy mass.
3. In a small skillet, heat butter and brown garlic just until fragrant. Pour butter and garlic into smashed potatoes.
4. Add cream/milk and season with salt and pepper.
5. Mix everything together until well blended.

Monday, August 20, 2007

Chicken with 20 Cloves of Garlic


I love garlic. I remember once I went to the garlic festival in Gilroy, California and they had garlic everything...garlic butter, garlic mascots, garlic souvenirs, and even garlic ice cream (!). Ina Garten's recipe for Chicken with 40 Cloves of Garlic had chicken (good!), wine (good!!) and lots of garlic (GOOD!!!) so I decided to use it as my inspiration for tonight's meal. I was making half the recipe so I baptized my dish:


Chicken with 20 Cloves of Garlic

  • 8 chicken thighs, bone-in, trimmed of excess fat and skin
  • 2 whole heads of garlic (about 20 cloves), separated into cloves
  • 2 tbsp. olive oil
  • kosher salt
  • freshly ground black pepper
  • 1 cup white wine
  • 7-8 springs fresh thyme
  • 1 tbsp. flour
  • 2 tbsp. cream (I used 18%)

1. Season chicken pieces with salt and pepper. Don't be stingy.

2. In a heavy pot brown chicken on both sides, making sure you get good caramelization. You might need to do this in batches.

3. Meanwhile, boil a bit of water in a small pot and blanch the unpeeled garlic cloves for a minute. Drain then peel the garlic cloves.

4. Remove chicken from pot and set aside.

5. In the same pot, lightly brown the garlic cloves. Set aside. At this point, I remove the excess oil and fat by sopping it up with a paper towel, but you don't have to. It's probably more flavorful to keep it in the dish, but the tiny health-conscious part of my brain nags at me and guilt prevails.

6. Deglaze the pot with wine, scraping the brown bits on the bottom.

7. Put chicken and garlic back in the wine, along with the the thyme sprigs.

8. Simmer for 30 minutes.

9. Remove chicken and garlic from pot and mix in the flour into the sauce making a roux.

10. Once flour is thoroughly incorporated and sauce has thickened, turn off heat and add cream.

11. Pour sauce over chicken and garlic.


In the end, the garlic becomes soft and sweet and buttery. It's perfect slathered on pieces of rustic, crusty bread which you can then use to mop up the wonderful sauce.

Saturday, August 18, 2007

Sour Cream Pound Cake

This is one of my tried and true recipes. I've made it many, many times...using a mixer, by hand, with salted butter, with unsalted butter, with full fat sour cream, with low-fat sour cream, in a 350 oven, in a loaf pan, as cupcakes...I haven't had a disaster yet. So I guess you could call this recipe fool-proof?

My hand-written recipe, copied from somewhere long ago, stained with butter from the many times it's been used, is permanently attached to my fridge door.


Sour Cream Pound Cake

  • 1 cup (1/2 lb.) butter
  • 2 1/2 cups sugar
  • 6 eggs
  • 3 cups flour
  • 1 cup sour cream
  • 1 tsp. lemon extract
  • 1 1/2 tsp. vanilla extract
  • 1/4 tsp. baking soda
1. Preheat oven to 325.
2. Grease and flour a 10 cup bundt pan.
3. Cream butter and sugar until light and fluffy.
4. Add eggs one at a time, mixing after eah addition.
5. Add 1 cup flour, 1/2 cup sour cream, next cup of flour, rest of sour cream, and rest of flour, mixing after each addition.
6. Add the extracts and baking soda.
7. Pour into prepared pan and bake for 60-75 minutes, baking until top is golden and cake tester inserted into middle comes out clean.


The finished cake will look like this...


Invert cake onto a wire rack to cool. Dust with confectioner's sugar. This cake is great with a cup of coffee or tea. It freezes very well too!

Friday, August 17, 2007

Brown Sugar and Mustard Roast Pork

I felt like making a nice dinner tonight. Our menu:

Goat cheese and arugula salad with pears, dates and walnuts

Brown sugar and mustard-crusted roast pork

Rosemary-garlic duo of potatoes


Brown Sugar and Mustard-Crusted Roast Pork

*2 tbsp. whole grain mustard
*1 tbsp. packed brown sugar
*1 tsp. salt
*1/2 tsp. freshly cracked black pepper
*1 tbsp. olive oil
*1 tsp. dried rosemary
*6 cloves garlic, each clove sliced into 4 slivers
*1 to 1.5 kg pork roast

1. Mix first six ingredients and set aside.

2. Stab pork roast in several places and insert garlic sliver into each hole.

3. Put pork in roasting pan and rub with mustard mixture. Let stand to marinate for a couple of hours.

4. Roast in a 350 oven until thermometer inserted into the thickest part reads 140, approximately 60-90 mintes. Once your thermometer reads 140, turn oven to 500 and finish roast for another 10 minutes. You can also use the broiler for 5-7 minutes.

5. Let roast sit for 10-15 minutes before carving.


Rosemary-Garlic Duo of Potatoes

*6 medium Yukon gold potatoes, cubed into 2 inch pieces, skin on
*2 yams/sweet potatoes, peeled, cubed into 2 inch pieces
*3 tsp. minced garlic
*1/2 cup olive oil
*2 tsp. kosher salt
*1 tsp. cracked black pepper

1. Toss everything together.
2. Roast in 350 oven for 30-45 minutes.
3. Brown under broiler or put back in oven when you raise the roast temp. to 500.
4. Watch closely because the sweet potatoes can burn. Brown for about 5 minutes.


Goat Cheese and Arugula Salad with Pears, Dates and Walnuts
*3 cups arugula leaves
*2 slices goat cheese, cubed
*1 bosc pear sliced
*1/2 cup walnuts, toasted lightly
*4 dried dates
*2 tbsp. balsamic vinegar
*3 tbsp. olive oil

1. In a small skillet, saute pear slices and dates in a bit of olive oil until pear slices are lightly caramelized.
2. Toss with arugula, goat cheese and walnuts.
3. Dress with an emulsion of 2 tbsp. balsamic vinegar and 3 tbsp. olive oil.