Wednesday, August 29, 2007

Asian Brined Chicken

It's been a crazy week. Son #1 needed surgery and the past few days felt like I was on an emotional roller coaster. Fortunately, everything went well and he's home now, recuperating.

I've missed my kitchen, I've missed cooking, and I've missed blogging. And after preparing tonight's dinner, laying out the table, saying grace and eating together, I feel some semblance of normalcy already.

I brined this chicken last night and the 24-hour soak really worked wonders. The chicken was very juicy and amazingly flavorful. Even the breast meat, which can sometimes taste bland, was excellent. Of course having each bite with a bit of crisp skin helped.

Asian Brined Chicken

1 3-4 lb. chicken
4 cups water
1/2 cup oyster sauce
1/2 cup dark soy sauce
1 tbsp. sriracha hot sauce (optional)
2 tbsp. grated ginger
1 tbsp. minced garlic
3 stalks lemongrass, chopped into 1 inch pieces
3 kaffir lime leaves
1/4 cup chinese rice wine
2 tbsp. rice vinegar
2 tbsp. sugar
2 tbsp. five spice powder

1. Mix all the ingredients except the chicken until well blended.
2. Soak chicken in brining liquid for 12-24 hours. Keep chicken in fridge.
3. Butterly chicken (or not, if you so prefer) and roast at 325 for 45-50 minutes.
4. Raise oven temperature to 400 and roast chicken for 15 minutes more.
5. Alternatively, you could use a turbo broiler and roast chicken at 175, skin side down for 30 minutes. Flip chicken over and roast another 30 minutes.
6. Allow chicken to rest for about 5-10 minutes before serving.

The low roasting temperature for this dish allows the chicken to cook without overbrowning. The soy sauce, oyster sauce and sugar will burn if you roast the chicken at a high temperature. So start low and then increase the temperature toward the end of cooking to brown and crisp the skin.

Son #2 had his chicken with hoisin sauce, but I enjoyed mine with a sprinkling of Eurasian Black Sea Salt, which has an "eggy" flavor due to its higher sulfur content. It was a very nice "welcome back home" meal indeed.
Thursday, August 23, 2007

Apple-Onion Pork Chops with Smashed Garlic Potatoes

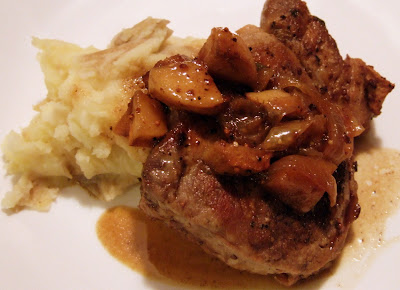
It's only been 3 days, yet I feel like I haven't posted since forever! Well, for Tuesday night, we had M over and it was pasta for dinner, but I used bacon instead of chorizo. Then Wednesday night was left-overs for the boys since I had a work thing. So to make up for left-over night, for dinner we had this...
Apple-Onion Pork Chops

6 pork chops, boneless, each about 3/4 inch thick
kosher salt
pepper
2 fuji apples, peeled and diced
1 sweet onion, sliced
1 heaping tsp. whole grain mustard
4 sage leaves
1/2 cup white wine
1 cup chicken broth

1. Season chops generously with salt and pepper.
2. In a heavy skillet, sear meat until both sides are well browned.
3. Remove meat from skillet, lower heat to medium and add onions and apples.
4. Saute until onions are partly softened, about 5-7 minutes.
5. Deglaze pan with white wine and add mustard and sage.
6. Reduce until almost all of wine has evaporated.
7. Add chicken broth.
8. Return chops into skillet along with juices.
9. Finish in a 375 oven for 15 minutes.

I served this dish with smashed garlic potatoes, which is one of my favorite ways of preparing potatoes. The skin provides a wonderful contrast to the rustic creaminess of the potato chunks.

Smashed Garlic Potatoes

6 Yukon gold potatoes, washed well
1 tbsp. minced garlic
2 tbsp. butter
1/2 cup cream or milk
salt and pepper

1. Boil potatoes with their skins on until tender.
2. Drain. In a large bowl, use a potato masher or a large sturdy fork to smash potatoes. Smash the skins as well. You want small and large chunks, not a homogenous, mushy mass.
3. In a small skillet, heat butter and brown garlic just until fragrant. Pour butter and garlic into smashed potatoes.
4. Add cream/milk and season with salt and pepper.
5. Mix everything together until well blended.

Monday, August 20, 2007

Chicken with 20 Cloves of Garlic


I love garlic. I remember once I went to the garlic festival in Gilroy, California and they had garlic everything...garlic butter, garlic mascots, garlic souvenirs, and even garlic ice cream (!). Ina Garten's recipe for Chicken with 40 Cloves of Garlic had chicken (good!), wine (good!!) and lots of garlic (GOOD!!!) so I decided to use it as my inspiration for tonight's meal. I was making half the recipe so I baptized my dish:


Chicken with 20 Cloves of Garlic

  • 8 chicken thighs, bone-in, trimmed of excess fat and skin
  • 2 whole heads of garlic (about 20 cloves), separated into cloves
  • 2 tbsp. olive oil
  • kosher salt
  • freshly ground black pepper
  • 1 cup white wine
  • 7-8 springs fresh thyme
  • 1 tbsp. flour
  • 2 tbsp. cream (I used 18%)

1. Season chicken pieces with salt and pepper. Don't be stingy.

2. In a heavy pot brown chicken on both sides, making sure you get good caramelization. You might need to do this in batches.

3. Meanwhile, boil a bit of water in a small pot and blanch the unpeeled garlic cloves for a minute. Drain then peel the garlic cloves.

4. Remove chicken from pot and set aside.

5. In the same pot, lightly brown the garlic cloves. Set aside. At this point, I remove the excess oil and fat by sopping it up with a paper towel, but you don't have to. It's probably more flavorful to keep it in the dish, but the tiny health-conscious part of my brain nags at me and guilt prevails.

6. Deglaze the pot with wine, scraping the brown bits on the bottom.

7. Put chicken and garlic back in the wine, along with the the thyme sprigs.

8. Simmer for 30 minutes.

9. Remove chicken and garlic from pot and mix in the flour into the sauce making a roux.

10. Once flour is thoroughly incorporated and sauce has thickened, turn off heat and add cream.

11. Pour sauce over chicken and garlic.


In the end, the garlic becomes soft and sweet and buttery. It's perfect slathered on pieces of rustic, crusty bread which you can then use to mop up the wonderful sauce.

Saturday, August 18, 2007

Sour Cream Pound Cake

This is one of my tried and true recipes. I've made it many, many times...using a mixer, by hand, with salted butter, with unsalted butter, with full fat sour cream, with low-fat sour cream, in a 350 oven, in a loaf pan, as cupcakes...I haven't had a disaster yet. So I guess you could call this recipe fool-proof?

My hand-written recipe, copied from somewhere long ago, stained with butter from the many times it's been used, is permanently attached to my fridge door.


Sour Cream Pound Cake

  • 1 cup (1/2 lb.) butter
  • 2 1/2 cups sugar
  • 6 eggs
  • 3 cups flour
  • 1 cup sour cream
  • 1 tsp. lemon extract
  • 1 1/2 tsp. vanilla extract
  • 1/4 tsp. baking soda
1. Preheat oven to 325.
2. Grease and flour a 10 cup bundt pan.
3. Cream butter and sugar until light and fluffy.
4. Add eggs one at a time, mixing after eah addition.
5. Add 1 cup flour, 1/2 cup sour cream, next cup of flour, rest of sour cream, and rest of flour, mixing after each addition.
6. Add the extracts and baking soda.
7. Pour into prepared pan and bake for 60-75 minutes, baking until top is golden and cake tester inserted into middle comes out clean.


The finished cake will look like this...


Invert cake onto a wire rack to cool. Dust with confectioner's sugar. This cake is great with a cup of coffee or tea. It freezes very well too!

Friday, August 17, 2007

Brown Sugar and Mustard Roast Pork

I felt like making a nice dinner tonight. Our menu:

Goat cheese and arugula salad with pears, dates and walnuts

Brown sugar and mustard-crusted roast pork

Rosemary-garlic duo of potatoes


Brown Sugar and Mustard-Crusted Roast Pork

*2 tbsp. whole grain mustard
*1 tbsp. packed brown sugar
*1 tsp. salt
*1/2 tsp. freshly cracked black pepper
*1 tbsp. olive oil
*1 tsp. dried rosemary
*6 cloves garlic, each clove sliced into 4 slivers
*1 to 1.5 kg pork roast

1. Mix first six ingredients and set aside.

2. Stab pork roast in several places and insert garlic sliver into each hole.

3. Put pork in roasting pan and rub with mustard mixture. Let stand to marinate for a couple of hours.

4. Roast in a 350 oven until thermometer inserted into the thickest part reads 140, approximately 60-90 mintes. Once your thermometer reads 140, turn oven to 500 and finish roast for another 10 minutes. You can also use the broiler for 5-7 minutes.

5. Let roast sit for 10-15 minutes before carving.


Rosemary-Garlic Duo of Potatoes

*6 medium Yukon gold potatoes, cubed into 2 inch pieces, skin on
*2 yams/sweet potatoes, peeled, cubed into 2 inch pieces
*3 tsp. minced garlic
*1/2 cup olive oil
*2 tsp. kosher salt
*1 tsp. cracked black pepper

1. Toss everything together.
2. Roast in 350 oven for 30-45 minutes.
3. Brown under broiler or put back in oven when you raise the roast temp. to 500.
4. Watch closely because the sweet potatoes can burn. Brown for about 5 minutes.


Goat Cheese and Arugula Salad with Pears, Dates and Walnuts
*3 cups arugula leaves
*2 slices goat cheese, cubed
*1 bosc pear sliced
*1/2 cup walnuts, toasted lightly
*4 dried dates
*2 tbsp. balsamic vinegar
*3 tbsp. olive oil

1. In a small skillet, saute pear slices and dates in a bit of olive oil until pear slices are lightly caramelized.
2. Toss with arugula, goat cheese and walnuts.
3. Dress with an emulsion of 2 tbsp. balsamic vinegar and 3 tbsp. olive oil.

Thursday, August 16, 2007

Hershey's and Maldon


Hershey's Caramel Pecan Filled Milk Chocolate Truffle sprinkled with Maldon Sea Salt...don't knock it 'til you try it.

I was craving a sweet morsel to end my spicy Thai inspired meal. I opened the cupboard and scanned my stash. An epicurious recipe came to mind. So I though...why not?

It was fabulous. The high note from the salt and the sweetness of the caramel and chocolate intermingled and struck the perfect balance. The Maldon added a fleeting crunch as the creamy milk chocolate and caramel melted in my mouth.

One more...just one more...I promise...

Green Chicken Curry


This is my version of "thirty minute curry." It's delicious, simple, and very easy. Plus, it's a great way to get my kids to eat their veggies. I like the Mae Ploy brand of curry paste but I always fix it up. Somehow, ready made pastes and powders lack that oomph that gives Thai curry its kick.

  • 6 boneless chicken thighs, cut into cubes
  • 1 can coconut milk
  • 2 heaping tsp. shrimp paste
  • 2 tbsp. green curry paste
  • 2 tbsp. fish sauce
  • 1 tbsp. sugar
  • 5 slices ginger
  • 3 kaffir lime leaves
  • 3 stalks lemon grass, cut into 1 inch pieces (white parts only)
  • 2 heads broccoli, cut into florets
  • 1 cup sliced white mushrooms
  • 1 cup snow peas
  • 1/2 red pepper, cubed


1. Simmer coconut milk with shrimp paste, curry paste, fish sauce, sugar, ginger, lime leaves and lemon grass for 10 minutes.

2. Add chicken and cook for 10 minutes.

3. Add veggies. Simmer for a few minutes more.

4. Serve with jasmine rice.

Sunday, August 12, 2007

Maldon Salt

Sea salt seems to be everywhere these days. From amuse bouches to desserts, this condiment has revolutionized the way chefs have achieved the yin and yang of food. I finally got myself a box of Maldon Salt, a sea salt from the UK. In the beginning, I couldn't decide which salt to buy but this article convinced me.

Maldon salt has an unusual shape. It comes in flakes rather than geometric crystals and I think it's this peculiarity that makes it so special. The flakes provide a rather interesting texture to the food that is finished with the salt. It's also not as aggressive as the usual kosher salt I use. While the kosher salt seems to hit your mouth with full force, the Maldon lingers and gently creeps up on your palate.


They say the best sea salts elevate the simplest of food to a whole new level. Yesterday, a friend gave me some cherry tomatoes that she harvested from her backyard. I popped one in my mouth...good, sweet, intense tomato flavor. I popped another one with a sprinkling of Maldon...wow, what a difference a few salt crystals made! The salt made the sweetness of the tomato come alive and the crisp texture of the salt provided a wonderful contrast to the juiciness of the tomato.

And so I went out and gathered a few basil leaves from my herb planter and made a simple appetizer. Home grown tomatoes and basil, sprinkled with Maldon salt...a taste of summer on a plate.

One of these days...

...I'm going to have the patience, determination, and the equipment to make this.

It looks absolutely sinful, but what bacon isn't? If you're going to be bad, might as well make it worth it.

Saturday, August 11, 2007

Cheesecake with Blueberry, Lemon and Sage


We got together with a few friends today and I made a few things to bring. The Kimchi Fried Rice went really well with the Korean inspired meal that S & A served. We had so much to eat: beef ribs, chicken, chap chae, and lots of banchan. But of course, we had to make room for dessert, a cheesecake inspired by a recipe from one of my favorite bloggers.

Cheesecake with Blueberry, Lemon and Sage


Crust:
  • 2 cups graham cracker crumbs
  • 1/2 cup butter
  • 1/4 cup sugar
*Mix all ingredients and press firmly into a 9-inch springform pan. Bake at 300 degrees for 10 minutes.


Cheesecake:

  • 2 bars cream cheese, softened
  • 1 can condensed milk
  • 3 eggs
  • 1 tsp. vanilla extract
  • 1/4 tsp. lemon extract
*Mix all ingredients together until very smooth and free of lumps. Pour into baked crust and bake in 300 degree oven for 50-55 minutes. Cool and chill for several hours or overnight.


Topping:

  • 2 cups fresh blueberries
  • 1/4 cup sugar
  • 1 tbsp. lemon juice
  • 3 sage leaves
  • 1 tbsp. cornstarch dissolved in 1 tbsp. water
*Put berries, lemon juice, sugar and sage in a small saucepan and cook over medium heat. Stir gently so as not to crush the berries. Once berries are soft, add the cornstarch slurry and cook until thickened, stirring frequently. Cool and serve with cheesecake.

Thanks for the wonderful dinner, S & A!

Thursday, August 9, 2007

These are a few of my favorite things...

Seven reasons why I love my silicone spoonulas and spatulas.

1. They're heat safe up to 500 degrees. This means I can leave them in my pot/pan and have no fear that they will melt (unlike plastic).

2. They do not conduct/retain heat. Corollary to #2, this means that if I leave them in the pot and touch them a few minutes later, I will not need to go to the ER for burns on my hand. This also means that when I taste as I'm cooking, I need not be worried that the hot cooking utensil will sear off my tongue and lips (unlike metal).

3. They are easy to clean. Silicone does not absorb colors and odors from food so even if I cook a tomato based dish, they will not turn orange (unlike wood).

4. They' re cheap. I paid an average of $5 for each one of mine.

5. They're durable. They look the same today as they did when I bought them a year ago, despite daily use and abuse.

6. They're soft but tough. Soft enough that they won't scratch my non-stick and enamel pans but sturdy enough to scrape the fond when I deglaze.


And, of course,


7. They're pretty! (do you notice a pattern here? pretty mixer, pretty knife, and pretty spoonulas...)

Vietnamese Pork Chops

Once in a while (actually more than once in a while), I will use premade marinades, sauces, dressings, etc. I think it's inevitable, especially when moms are so often part of the work force too. I saw this marinade for Vietnamese BBQ during one of my many forays into an Asian supermarket. The ingredients read: lemongrass, paprika, chili, black pepper, cloves, and monosodium glutamate (Gasp! Yes, yes, I know, I know. I don't normally cook with this but I figure once in a while isn't so terrible). It sounded interesting so I decided to give it a try.

I marinated (actually the husband) 8 quick-fry pork chops for a couple of hours in a paste made with the prepared spices and some oil. I grilled them up quickly and served them with nuoc cham and some long beans with crab and shrimp paste.

From top to bottom: pork chops, nuoc cham, long beans


Nuoc Cham
  • 2 1/2 tbsp. sugar
  • 1 1/2 tbsp. water
  • 1/4 cup fish sauce
  • 1/4 cup lemon juice
  • 1 clove garlic, minced
  • 1 thai bird chili, minced (optional) -- I used chili flakes in oil
  • 1-2 tbsp. shredded carrot

Mix all ingredients together until sugar is dissolved.

For the long beans, I stir-fried the long beans in garlic, 1 tbsp. crab paste, 1 tbsp. shrimp paste and 2 tbsp. oyster sauce.

What to serve with all of this? Rice, of course! It was an excellent meal :-)

Wednesday, August 8, 2007

Me and my Furi: BFF

That means Best Friends Forever, for those unfamiliar with the term :-)

The first time I laid my eyes on a Furi knife was 5 years ago when we stayed with a lovely lady and her family in Brisbane, Australia. Jo, as I will refer to her in this story, widened my culinary horizons. She had never trained formally, and neither had I. But we spent many days experimenting in the kitchen and showing each other our favorite recipes. She had a vegetable and herb garden with a kaffir lime tree in her backyard. And because her husband worked off shore in South East Asia, she had a wide repertoir of Thai, Malaysian and Indonesian food. Because of Jo, curries, lemongrass, cilantro and mint became not just mere acquaintances but turned into trusted and oft used friends in the kitchen.

Jo had 2 Furi knives, a chef''s knife and a paring knife. And when I first held them in my hands, I knew that this was the knife I wanted. But I couldn't bear to part with AUD$100 for one knife, especially because my husband and I had barely begun to embark on our careers. So I went back home to Manila, all this time pining for those elusive Furi knives.

When we moved to our apartment in TO, I started shopping for a knife that wouldn't break the bank but would be a good investment and last me a long, long while. I was in Linens N Things, scanning the ceiling-high wall of knives...and lo and behold, up there, on the highest shelf was a lone box set of Furi knives, on sale, for the amazing price of CAD$79!!! I almost could not believe my eyes! I hurriedly bought the set and practically ran out of the store, fearing that the staff would realize how much a bargain I was getting. So for $79, I got a 10 inch chef's knife (my absolute favorite), a boning knife, a serrated utility knife, a carving fork and knife, a paring knife, a peeling knife, and a sharpener. Amazing deal.

I still wonder how much better a Global, a Shun, a Mac or a Wusthof would be. I've held them in my hands at my local Williams-Sonoma. But my Furi still feels the most comfortable. I love the fact that I can hold it with greasy or wet hands and it never slips. I love that fact that it has no seams, no nooks and crannies where bacteria can hide. I love the fact that with a few swipes on the sharpener and it as sharp as the day I bought it and I can cut paper thin slices of tomatoes again. And I love that it looks so good. So sleek and shiny. Just looking at it makes me happy :-)

Monday, August 6, 2007

Green Tea Sugar Cookies

I found pictures of the first version of green tea cookies I made a few months ago. This version is more crisp than the version I posted a while ago made with cream cheese. This recipe also makes a firmer dough which lends itself well to being rolled and cut with cute cookie cutters, which is what I did here :-)


Green Tea Sugar Cookies

  • 1/2 cup unsalted butter
  • 1/2 cup sugar
  • 1 egg
  • 1/2 tsp vanilla extract
  • 1/8 cup milk
  • 1 1/2 cup all purpose flour
  • 1/4 tsp baking powder
  • 1/4 tsp salt
  • 2-3 tsp green tea powder


1. Cream butter and sugar til light and fluffy.

2. Add egg, vanilla and milk.

3. Mix dry ingredients in a bowl and add to butter/egg mixture in 2-3 batches until you get a soft dough.

4. Form dough into disk and refrigerate for a few hours until firm.

5. Roll dough 1/4-1/3 inch thick and cut out with cookie cutters.

6. Chill cookie pieces. Meanwhile preheat oven to 350.

7. Bake cookies for 15-18 minutes until the bottom is slightly brown.

8. Cool on wire racks.

Matcha Cream Cheese Cookies

I had made green tea cookies before and, inspired by this amazing blogger, I decided I was going to make some this weekend. I normally just modify a sugar cookie or shortbread recipe to make the green tea ones but I inspected my fridge and I found a bar of cream cheese lying around, 2 weeks shy of its expiration date. So, off to google I went and found several recipes for cream cheese cookies. I chose one and modified it a bit, ending up with half a batch of plain vanilla cookies and half a batch of green tea or matcha flavored ones.

Cream Cheese Cookies (basic recipe)

  • 1 cup sugar
  • 1 cup butter
  • 3 oz (or about 85 grams) cream cheese
  • 1/2 tsp salt
  • 1 tsp vanilla
  • 1 egg yolk
  • 2 1/4 cups flour

1. Preheat oven to 350.

2. Cream butter, cheese, sugar, salt, vanilla and egg yolk until light and fluffy.

3. Add flour in 3 batches, mixing after each addition.

4. Form dough into 1 inch balls with your hands.

5. Take a glass, grease the bottom and dip in sugar. Use glass to flatten dough balls, dipping in sugar after each use.

6. Bake for 12 minutes until bottom is slightly brown.

7. Cool on cookie rack.

For the matcha version, I added 3 tsp. of matcha powder to half the batter. I also used black sesame seeds to top the cookies, more for decoration than anything else. Very zen looking, don't you think?


My preciousssss....

I've wanted, pined and longed for a Kitchen Aid mixer for as long as I can remember. From the moment I felt the first pangs of culinary curiosity, this was one of the things I knew I needed to have. So when we moved into our own place here in TO, I said to myself I was going to get one. But it took me a whole year to finally take the plunge. And I have not looked back since :-)

This marvelous machine makes short work of cookie dough, bread, egg whites, whipped cream, lumpia filling, and my liege waffle batter. It kneads, whips, beats, and mixes. And most importantly...it's pretty!

When I finally get my own real kitchen, "my precious" will have her own place of honor. I want a cabinet with a sliding attachment so that I can keep her dust-free yet easily take her out when I need her. I don't know why I call it a "her." I just thought a great multitasker that can also look pretty can only be female. Hehe!

Saturday, August 4, 2007

Adobo Flakes


Any Filipino cook worth his/her salt will know how to make adobo. This dish of meat stewed in soy sauce, vinegar, garlic, bay leaves and pepper is prepared in almost every household in the Philippines. But each region, each province and each cook will have his or her own variation of this ubiquitous dish.

This version of mine is by far my favorite way of cooking adobo. I don't make it often because it involves many steps and dirties up so many pots and dishes. But when I do, I make a huge batch enough for 3 meals or so. I serve one portion and freeze the rest so we can reheat the adobo and have it when we feel like having something truly Filipino.


ADOBO FLAKES

8 chicken legs (thigh and drumstick)
2 cups light soy sauce
1 cup white vinegar
1 cup apple cider vinegar
10 cloves garlic, smashed
1 tbsp. whole peppercorns
4 bayleaves
2 tsp. minced garlic
2 tbsp. oil

1. In a non-reactive pot, simmer chicken in the next 6 ingredients for about 45 minutes. Do not cover the pot and rearrange the chicken once in a while to make sure that all of the pieces spend some time submerged in the simmering liquid.

2. Once the chicken is done, take the pieces out and cool. Meanwhile, strain the cooking liquid and remove all the fat that floats on top. Set the liquid aside.

3. When the chicken is cool enough to handle, remove the meat from the bones.

4. In a non-stick pan, saute the minced garlic in the oil until brown and add the chicken meat plus 1/4 cup of the cooking liquid. Boil over medium high heat.

5. As the liquid evaporates, break up the chicken pieces and stir occasionally. Add 1/4 cooking liquid at a time and let this evaporate while shredding the chicken meat with a spatula.

6. Continue with this for another 4-6 times or so, adding liquid as the chicken meat dries up. You will use up about 1 and 1/2 cup of your cooking liquid.

7. Let the chicken meat fry in the pan, stirring frequently and making sure the bottom does not burn. Slowly, you will see that the chicken meat will become dry and slightly crisp.


Since a picture is worth a thousand words, here are pictures of the transformation...from the ordinary to the sublime :-)


Eggs

Whenever we have anyone joining us for breakfast in our home, and I'm cooking up some eggs, I will never fail to ask them how they want their eggs done. I know from first hand experience that people will have their own egg preferences and one cannot assume that just because they come from the same household, they will all want their eggs the same way.

Concrete example here...


This was the platter of eggs that I cooked this morning. It looks like the United Nations of eggs, doesn't it?

Son #2's sunny side up egg is on top. He likes his sunny side up just barely done, with a very runny yolk and no hint of caramelization whatsoever.

I, on the other hand, like my eggs overcooked. Hence the brown egg on the right. I cook my eggs overhard resulting in a solid yolk. Plus, I like the edge burnt so that it becomes almost crisp.

Hubby like his in between. A hint of browning on the bottom and a yolk that is in between runny and set. So his egg is the one on the bottom.

And Son #1 doesn't like sunny side up eggs. He will only take his egg scrambled or hard boiled. He likes his scrambled egg firm (not fluffy). Almost like an empty omelet. His egg is on the left.


Even though our egg preferences differ, we all agree on one thing though...eggs taste best when eaten with tocino/longganisa/spam/bacon/tapa and rice, of course :-)

How 'bout you? How do you like your eggs?

Cheesesteak

We were planning to go to Philly this weekend to visit a friend and hopefully make a side trip into Manhattan. But plans fizzled out so no more Philly trip :-(

But that didn't mean we couldn't have the quintessential Philly food...the cheesesteak. I will never claim that what I made was an authentic Philly cheesesteak, lest I bring the wrath of the purists on myself. But I tried to stick to the basic tenets and am happy to say that the end product was very, very good :-)


Cheesesteak Sandwich (Inspired by the Philly Version)


400 grams thinly sliced beef (I used the sukiyaki or hotpot cut in the Asian grocery)
1 onion, sliced
1/2 red sweet pepper, sliced
1 tsp. Barberian's steak seasoning
freshly ground black pepper
2 tsp. butter
1 1/2 cups grated cheese*
6 buns**


1. In a skillet, saute onion and pepper in 1 tsp butter until caramelized. Set aside

2. In the same pan, melt the other tsp. of butter and cook the beef, shredding into small pieces with a spatula. Sprinkle the steak seasoning as you are mixing and shredding the beef. Make sure not to over cook the meat so that it stays juicy.

3. Put the meat, caramelized veggies and cheese in a bun. Broil in the oven for 2-3 minutes, just until the cheese has melted.***


* There is great debate as to what the traditional cheese is for a Philly Cheesesteak. Some people say that Cheez Whiz is the only way to go but others use American or Provolone. I had some excellent Canadian cheddar at home so that's what I used. Maybe I should call this Canadian Cheesesteak then, eh?

** The Philly version uses a bun with a hard crust and a soft interior. Son #2 doesn't like that so we used hotdog buns instead.

*** In Philly, they don't use the oven. They top the steak with cheese while it's still on the griddle. Then they cover it with the bun and flip everything into the bun when the cheese melts. To messy for me, so the oven worked great.


Friday, August 3, 2007

Seafood Curry


I'm so happy that my 2 sons have acquired the taste for spicy food :-) It definitely widens the scope of our gastronomic adventures. I remember 2 years ago, Tita N. came and we took her to a Thai restaurant. Son #1 was 8 at that time and Son #2 was 6. So while the adults enjoyed our pad thai and curries, we had to buy pizza for the boys. It's a good thing the restaurant was so accommodating!

But now, they actually request that I make our food even spicier! Today, we had dimsum for lunch and they put chili oil in their soy sauce. Yes, I have made them into spicy food fiends. Success!!!

So while this curry might be a tad hot for some people, our family enjoys this level of heat.

Yellow Seafood Curry

300 grams peeled black tiger prawns or large shrimp
300 grams squid or cuttlefish, cleaned and cut into 2 inch squares (I used frozen ready to cook, that's why it looks so fancy)
2 cups snow peas, topped and tailed
8-10 stalk chinese broccoli, cut into manageable pieces
6 slices ginger
3-4 kaffir lime leaves
1 small onion, quartered
1 can coconut milk
3 tbsp. yellow curry powder
1 tbsp. shrimp paste
1/2 tsp. sugar

1. In a pot, put the coconut milk, onion, ginger, kaffir lime leaves, sugar, shrimp paste and curry powder. Simmer over low heat for about 7-10 minutes.
2. Once the coconut has thickened slightly and has given off some oil, add the rest of the ingredients and simmer for a few minutes more. It won't take long because the seafood and the veggies need only a few minutes to cook. The squid, particularly, will become tough if cooked for more than a few minutes.


Just some notes. The saltiness of shrimp paste varies greatly with brand and country of origin. I used to use belacan, but I've now gone back to Filipino bagoong (I always use the Barrio Fiesta brand). It's gentler and less smelly and has that sweet-salty balance that I like. Also, belacan needs to be sauteed before using, which adds another step. If you don't have shrimp paste, fish sauce is an ok substitute but it doesn't have the depth of flavor that shrimp paste has. My suggestion is to taste the coconut milk before adding the seafood and veggies so you can adjust your seasoning then.

You can use any combination of protein and vegetables for this curry. I've made this with chicken and will try it with beef next time. Mushrooms work very well and so does broccoli. I just tend to use whatever I have on hand :-)

Wednesday, August 1, 2007

The Easiest Scone Recipe Ever


I just love scones. Freshly baked and slightly crumbly, with a little pat of butter, they make a lovely simple breakfast or snack. Of course I've had truly bad scones...stiff as a cardboard and just as tasteless. But a well made scone, as Martha Stewart would say, is "a good thing" albeit hard to find. So for a while I went on a scone baking spree and this recipe has become my favorite. I'm not even sure where I found it but it has never failed :-)

Fifteen minutes for prep and 15-18 minutes for baking. That's all you need and you have fresh baked goods sitting on your breakfast table in no time at all. Today, I made some to bring to work (since I start at 10 a.m.)...


Cream Scones


  • 2 cups all purpose flour
  • 1/4 cup sugar
  • 1 tbsp. baking powder
  • 1/2 tsp. salt
  • 1 1/4 cup heavy cream (NOT reduced fat)
  • 1 tsp. vanilla

1. Mix all dry ingredients together.
2. Add cream and vanilla.
3. Mix until everything comes together and knead 4-5 times.
4. Pat into a circle about an inch thick.
5. Cut into 8 slices (like a pizza) .
6. Bake in a 425 degree oven for 16-18 minutes.


This recipe lends itself to infinite variations. Sometimes I'd sprinkle raw sugar on top before baking. Or glaze with a cream/confectioners sugar mixture. You can use raisins (like I did today) or dried cranberries (my favorite). You can add nuts, orange or lemon zest, flax seeds, chocolate chips. If you think about it, this would be an excellent way to unleash your creative potential. Enjoy! :-)